A homelab is a specialized computing device or collection of devices designed to provide a controlled and customizable computing environment suitable for work, learning, or hobby purposes.
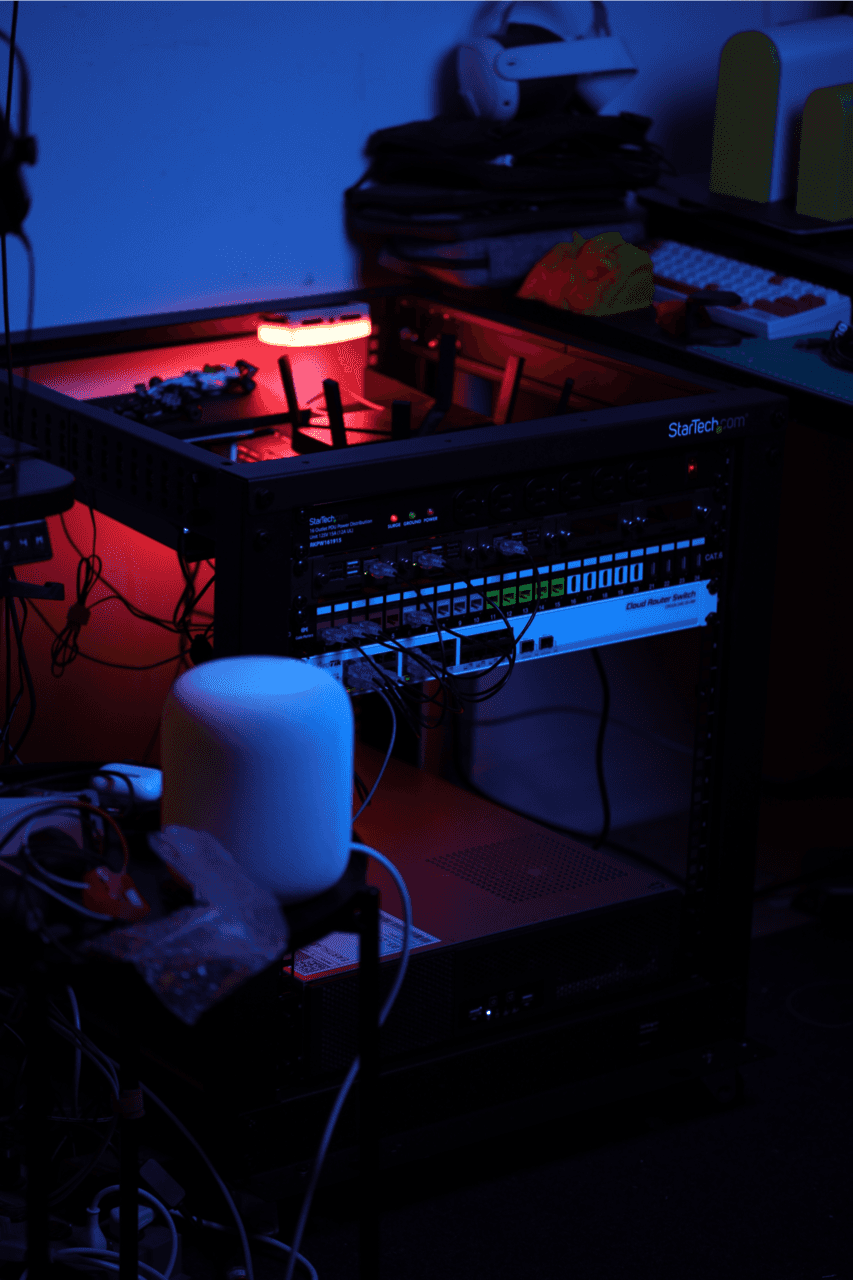
My setup thus far includes most of my computing devices and network equipment in a rack that fits under my desk and sits on wheels so it all be moved as one unit. It's as portable as it gets for me.

As a note to the reader, this is a living post that I update with my evolving setup– this is less a guide and more an example for anyone interested in homelabs.
Rack setup
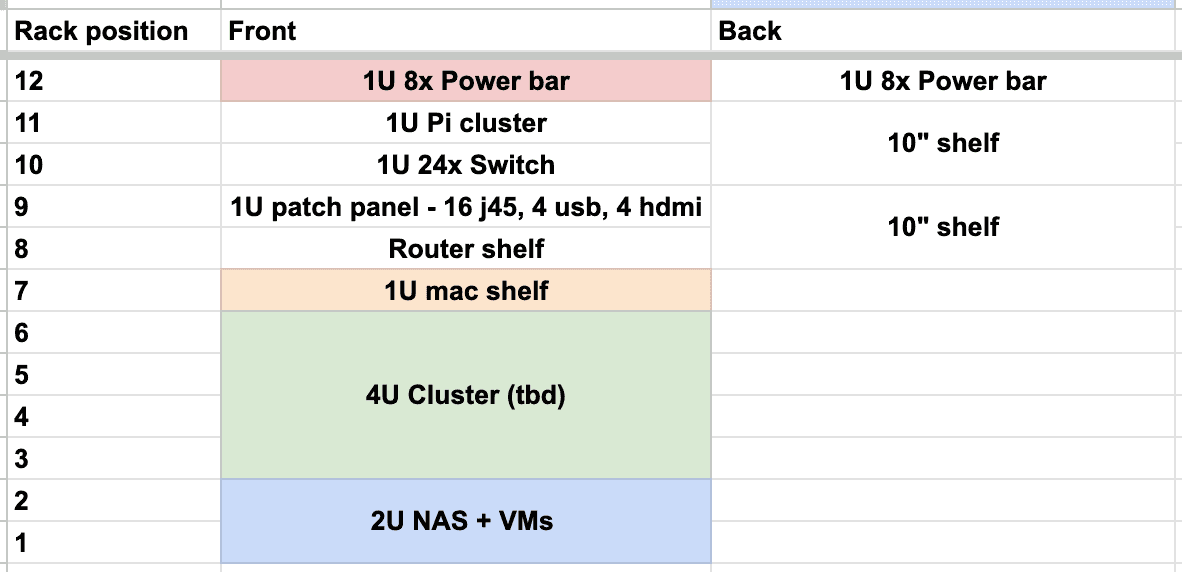
My choice of rack was something that is portable enough to sit under a desk in my workspace, and can be occational moved around as one unit– for this I picked a 12U rack on caster wheels.
It's a work in progress– the build I've planned allows me to have a large amount of local storage, enough compute to run dozens of applications across various operating systems and virtual environments, including room for LLMs, and local databases and archives of datasets and GPUs for deeplearning .

Networking
Part of the purpose of this portable rack is to contain my network devices alongside my computers. For the most part, I can simply plug-in internet access from any network provider, and have it securely distributed to my servers and any devices connected to the network via WiFi or wired LAN.
A managed network provides a predictable layer of security to my local network, while allowing devices to access my servers over LAN and via a VPN when I'm travelling. My exact setup does evolve, but generally consist of a managed router (usually Pfsense) and a switch. The exact appliances I use for this are not reccomendations nor endorsments.
Servers
Raspberry Pi cluster
I'm a fan of little computers that do things. Hence a Raspberry Pi cluster that I primarily use to run network monitoring software and a couple spares that I use as isolated VMs.
Multi-purpose server
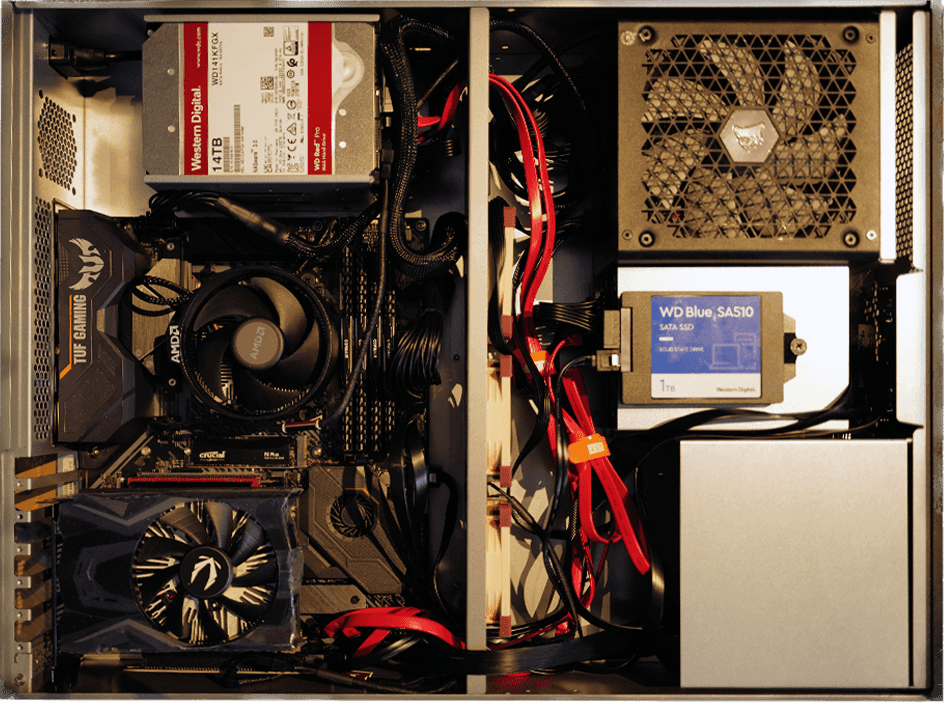
Features a 2U server chassis, providing reasonable space for expansion and compatibility with most server racks. The Asus AM4 TUF X570-Plus motherboard was chosen for its compatibility with the latest AMD Ryzen processors and support for PCIe 4.0. We opted for the AMD Ryzen 5 5600X CPU, which offers excellent performance for the price and can handle a wide range of tasks.

For our GPU, we selected the ZOTAC GeForce GTX 1650, which offers solid performance at an affordable price. Our memory choice is 64GB of Corsair DDR4 RAM, providing enough capacity for running multiple applications and processes.
Storage is a combination of high-capacity Western Digital HDDs set up in RAID 6, SATA SSDs for frequently accessed data, and a high-performance NVMe SSD for the operating system and essential applications. Finally, a reliable and efficient power supply, the CORSAIR RM650x, powers our server.
| Component | Specification |
|---|---|
| Case | SST-RM23-502 2U Server chassis |
| Motherboard | Asus AM4 TUF X570-Plus |
| GPU | ZOTAC GeForce GTX 1650 |
| CPU | AMD Ryzen 5 5600X |
| RAM | 4 x Samsung 16GB UDIMM DDR4 2666MHz ECC |
| Storage | 4 x Western Digital 14TB WD Red Pro NAS HDD (RAID 6) |
| 2 x 4TB SATA SSDs | |
| Crucial P3 Plus 1TB PCIe Gen4 3D NAND NVMe M.2 SSD | |
| PSU | CORSAIR RMX Series™ RM650x 80 Plus Gold Fully Modular ATX Power Supply |
These are components I had access to, so they're just here as a reference, not recommendations. With that said, this build has been performing great and recently hit a year of persistent uptime without a hitch.
GG server
My gaming PC turned GPU server is a pending addition. It's useful for video editing and rendering, any reasonable deep learning tasks, running LLMs, and lots of video games from PC to VR.
| Component | Specification |
|---|---|
| Motherboard | Asus X670-E |
| GPU | NVIDIA GeForce RTX 4090 |
| CPU | AMD Ryzen 9 7950X 16-Cores 4.5GHz |
| RAM | DDR5 6000MHz CL36 - 32 GB ( 2 x 16GB) x 2 |
| Storage | 1 TB NAND NVMe M.2 SSD |
| PSU | Cybercore 1300W Platinum |
Mac-mini server
This was a recent and useful addition. I've been experimenting with them for hosting local LLMs and they're almost ideal. The extra power of a mac-studio would be the ideal thing– hoping to upgrade this at some point, but this works well for now and gives me fewer reason to keep my power-hungry GPU build running.
Assembly
When assembling your server, focus on proper airflow and cable management for optimal performance and easier maintenance down the line. A well-organized build will not only be more efficient but also simpler to troubleshoot if issues arise.
(this is not a guide)
Once the hardware assembly is complete, install your preferred operating system (e.g., Linux, Windows Server, Proxmox) and set up the required services, applications, and network configurations.
Software
Managing a home server is not unlike managing any other server.There are a lot of options in terms of software you can run. The best choice for you depends on your specific needs, preferences, and familiarity with the platform. Some factors to consider include ease of use, hardware compatibility, feature set, scalability, and cost.
| Software | Key Features | Type |
|---|---|---|
| Proxmox | User-friendly web interface, supports VMs and containers, robust feature set, open-source | Virtualization & Server Management |
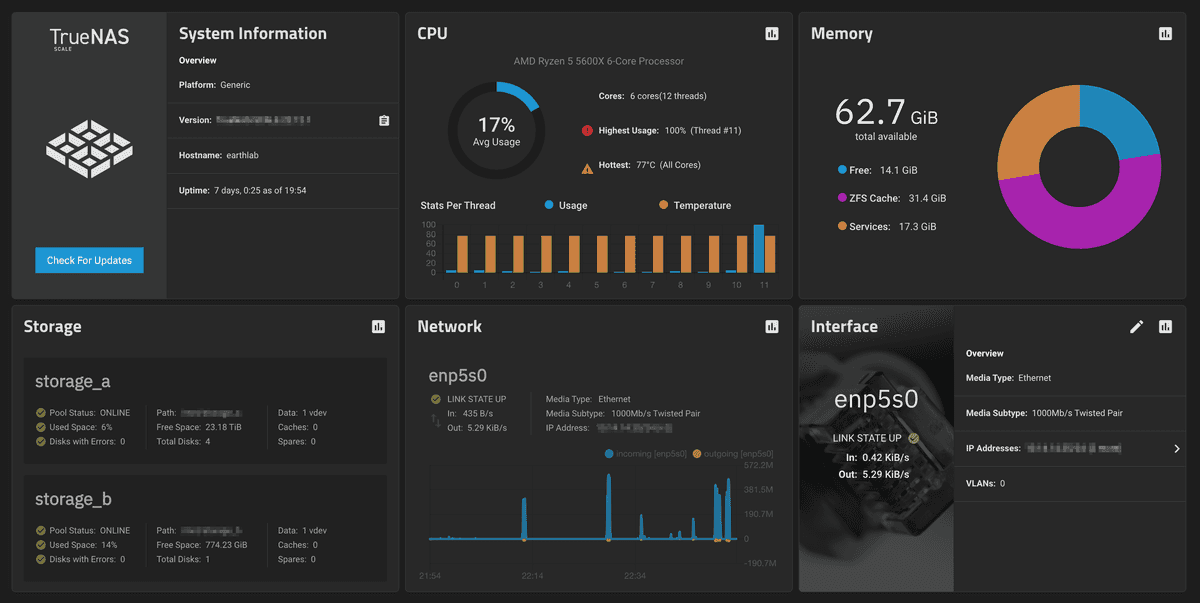
| TrueNAS SCALE | Linux-based, ZFS support, easy-to-use interface, compatible with VMs and containers, scalable | NAS & Virtualization |
| Pi-hole | Network-wide Ad Blocking, Web Interface for monitoring and configuration, Lightweight | Network Management & Security |
| Home Assistant | Privacy-focused, open-source home automation, supports a wide range of devices, easy integration | Home Automation |
| Docker | Supports containerization, simplifies deployment of applications, platform-independent | Containerization |
| Nextcloud | Self-hosted file share and communication platform, strong privacy and security, extendable with apps | File Sharing & Collaboration |
| pfSense | Open-source firewall and router, feature-rich, supports VPNs, traffic shaping, and network monitoring | Firewall & Router |
Maintenance
Proper maintenance and monitoring of your server are essential to ensure its reliability, security, and performance. Establishing a regular maintenance schedule and following best practices will help you achieve better uptime and extend the life of your server.

Monitoring
System performance: Keep an eye on your server's CPU, RAM, and disk usage. Monitoring tools such as htop, top, or Glances can help you track system performance in real-time. Setting up alerts for high resource usage can help you identify potential issues before they become critical.
Log files: Regularly review log files to identify potential issues, security threats, or application errors. Tools like Logwatch, Graylog, or the ELK stack (Elasticsearch, Logstash, Kibana) can help automate log analysis and alert you to potential problems.
Uptime: Monitor your server's uptime using tools such as Uptime Robot, Pingdom, or a self-hosted solution like Nagios or Zabbix. These tools can notify you if your server becomes unreachable or experiences downtime.
Updates and Security
Operating system updates: Keep your server's operating system up-to-date by regularly installing security patches and software updates. This will help protect your server from vulnerabilities and improve stability. Set up a schedule to check for updates at least once a week, and more frequently for critical security updates.
Application updates: Similarly, keep your server's applications and services updated to their latest stable versions. This ensures you have the latest features and security improvements. Regularly review the release notes for any significant changes or known issues.
Backups: Regularly back up your server's data to protect against data loss or corruption. Implement a 3-2-1 backup strategy: keep at least three copies of your data, store two of them on different storage media, and have at least one copy offsite.
Firewall and security: Configure and maintain a properly configured firewall to protect your server from unauthorized access. Regularly review firewall rules and update them as needed. Use intrusion detection systems (IDS) like Snort or Suricata to monitor network traffic for malicious activity.
User account management: Regularly review user accounts and permissions, removing any unused or unnecessary accounts. Enforce strong passwords and use multi-factor authentication where possible.
By following a couple maintenance and monitoring practices, you can ensure your server remains secure, performs optimally, and achieves better uptime. Remember that consistency is key, so set up a maintenance schedule and stick to it.
Building a home lab can be a rewarding experience, offering a centralized platform for learning, experimentation, and hosting. By carefully selecting components and software tailored to your specific needs, you can create a powerful and versatile server that can grow and adapt with you over time.
Whether you're a maker, technology enthusiast, or someone looking to localize their digital resources, a home lab server can be a useful addition to your tools.